
300x600
How to make a 3D Paper Snowflake

Learn how to make 3D paper snowflakes by watching this video tutorial and reading on for photographic step-by-step instructions.
I remember many years ago making one of these 3D paper snowflakes during a school holiday party. Those were made with plain white paper but they let the kids color on them first. I'm pretty sure this was done in a Kindergarten classroom.
So, no matter what age, this can be a fun paper project. Younger kids would need more help.
For our 3D paper snowflakes, we used scrapbooking paper from one of those large books of paper you can get at the craft store. These sheets are thicker but work well for these paper snowflakes. I've also seen them made from craft foam. A sparkly paper may also work, but we didn't try it ourselves.
You can make different sized snowflakes depending on what size paper you have. The paper snowflakes made from scrapbooking paper are pretty large. We cut our scrapbooking paper into 4 squares (each 6"). You can make smaller snowflakes by cutting smaller squares.
Fabric Snowflake Tutorial.

Scrapbook Paper, copy paper, or craft foam.
Scissors
Glue dots or stapler
INSTRUCTIONS: HOW TO MAKE THE 3D PAPER SNOWFLAKE
STEP 1: SQUARES
Start with your 7 pieces of paper cut into squares. Our squares were 6" but you can make many sizes as shown below. Approximate finished sizes from squares:
15" across paper snowflake is made from 6" blocks
13" across paper snowflake is made from 5" blocks.
7 1/2" across paper snowflake is made from 3" blocks.

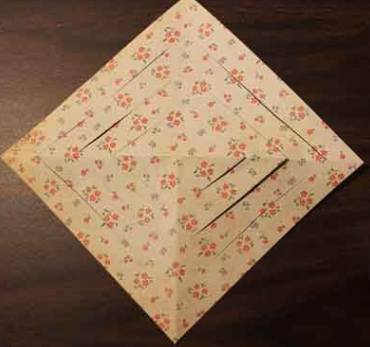
Step 2: Fold and Cut
For each paper, fold it in half, corner to corner.

Then fold it in half again, corner to corner. You will have a triangle shape.

Hold it with the paper edges in your non-scissor hand with the two folds towards you. The single-fold should be up.

Cut from the edge with the two folds towards the edge with the single fold. Do not cut all the way through. Stop cutting 1/4" to 1/2" inch from the single folded edge. You will be cutting 3 cuts and you need to try to evenly space them.
First cut.

Second Cut.

Third Cut.

The paper will look like this after the cuts are made.

Once you have your 7 pieces cut, then open them up. It's time to twist and flip. If you have a colored and white side of your paper, start with the color side up.
You can use glue dots or a stapler to hold the twists. We found that glue dots didn't hold the snowflake and it kept popping apart. But maybe you'll have more success with glue dots.
Wrap the two points of the center cuts up and overlap the points. Put a glue dot or staple them together.

Next, flip the paper over. Take the next two sections next to the center and overlap the points and glue/staple them together.

Flip the paper over and glue/staple the next one. Flip once more and glue/staple the last two sections.

This is a finished section.

Repeat for all 7 sections.
Step 4: Line Up Sections
Next, line all of the sections up side by side and make sure they are all facing the same way. If your colored paper is on the right, make sure all are on the right.
Glue/staple the sections together at the centers. The center is where you just glued/stapled them.

Step 5 - Make a Circle
Once you have the long row of them, take the first and the last one and join them together in a circle.

Step 6: Glue Inner Section
The last step is to glue/staple the center points together. We usually staple 3 together on each side, then staple the two sections of 3 together and to the last one.

Step 7 - Punch a Hole to Hang
Lastly, use a hole punch to make a hole in one of the outside points. Add a piece of string, yarn or ribbon to hang them by. Hang the paper snowflakes from a mantle, on a tree or in the window.


0 Komentar